
from my Sewaholic Hollyburn skirt pattern. I cut this pattern out last week from some 100% pre-washed cotton I found in my stash. I still have a good metre or so left so I’ll have to think of another project for it. Do any of you have a favourite tank top pattern that could use the remainder of my 100% cotton denim?
Since this is the fourth time I have cut out a Sewaholic Hollyburn, I think it is definitely one of my TNT patterns.
My skirt is coming together well. The thought of topstitching and revits and Jeans buttons makes me SMILE!
I started this skirt by making my interfaced back pockets. I just cut a large rectangle shape, as the Hollyburn didn’t have a pattern piece for this. I precisely measured for my angled corners. I marked the centre point of the bottom with my Chaco liner and I measured two inches up on each side and made marks there too.

Here my corners are ready to be cut off at the marks.
I zig zagged the edges to prevent fraying and sewed down a 1 inch flap at the top, which I turned and pressed. I then pressed a 1/2 ” hem all around the four sides.

Pressing the pockets made them so sturdy, they could quite possibly stand up on their own. I love pressing fabric to mold it into a shape you desire!

I am so persnickety that I lie my finished pockets on top of each other every which way to double check that they are EXACTLY the same shape and size.
I drew and sewed a few trial designs for my back pockets on scrap fabric, before making a decision on which to use. Drawing the first line on with my Chaco liner (corner to corner) helped ensure that the first line and all that followed would be very straight. I used my 1/4″ seam foot to topstitch my pocket design.

My finished back pocket design – simple, but I love it!

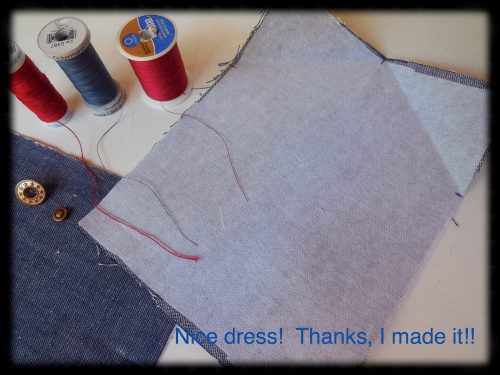
There are four seams on my skirt, all sewn on the diagonal – I want to make them all flat felled seams. I sewed the front and back centre seams first. I used a strip of interfacing to stabilize the seam. If I wasn’t so lazy, I would have looked for my rotary cutter and cut uniform, straight strips of interfacing!


Pressing is important. First I pressed the seam open. Then I carefully cut one side of the seam allowance down to 1/4 inch.

Then I pressed the wider seam allowance over the narrower one.

I tucked the wider seam allowance under the narrower one and pressed again.

I sewed it down with my 1/4 ” seam foot and my topstitching thread.

Now on to the next steps!
Are you a fan of topstitching like me? Do you have any tips to share?
Happy Sewing!

v jealous of your fantastic top stitching and neat finish – looking forward to seeing the finished piece
Well thank you very much! I’m almost done.
Ooo, someone else who likes top-stitching! I think this very much depends on your machine as to whether you like it or not. My old Singer, doesn’t mind top-stitch thread and it never causes me any pain, but I know there are plenty of machines that really hate top-stitch thread. Love your pocket design – simple but effective.
That’s true! It does depend on the machine a lot. My last machine couldn’t sew proper button holes. This is a pretty good machine.
I like top stitching too – but I have an old Singer machine which turns out beautiful stitching no matter what. That helps.
Yes it does. Funny how some of the newer ones with all their fancy stitches just can’t make it sometimes!
Love top stitching, love that pocket detail. It’s very effective. I prefer to topstitch on the right side of the fabric so i know how the outside finished side looks. However your looks even anyway. Great job
Thanks! It might be hard to tell from the photos but I do topstitching on the right side. I use the topstitching thread on top and the bobbin has regular thread in it. It makes it run more smoothly through my machine and I find topstitching thread to be expensive so I’m not using it on the top and the bottom. I do like using my 1/4″ and edge sewing feet to help with the straight lines! 😊
Good grief. Did you press underneath then flip over and sew!!! Needed to have another look! Ok, so I would do it all from the front! That’s pretty tricky top stitching that you do! Again, looks great.
🤔 umm… Yes, I fold and press the seam from the wrong side, underneath. Then I pin it and flip it over and sew the topstitching from the right side. It’s just the way I learned BUT if you have a different way, I’d love to see it! Post it when you have a chance. 😃
That’s brilliantly sewn if you do it that way. I would just do it in reverse and press under and stitch all on the top side. I’m sure that there must be yet another way. If i find one I’ll let you know. It’s going to be a lovely skirt, looking forward to seeing it finished. 🙂
I can’t claim “brilliantly sewn” – that’s just the way I learned how to do it. Can’t remember who or where (yes I’m THAT old!) I just sew the seam, press and pin it the way I want it to look and then topstitch the right side. I sure hope I haven’t confused anyone!
Hey I’m even older. As we both now it’s good to see new or other ways of doing one thing. In my mind, you’ve sewn the seam blind, if you see what I mean, and that’s really tricky!!
😄👍
Lovely sewing on this skirt! Must admit flat-felled seams aren’t in my repertoire at this time. But if I should ever need ’em, this is a marvelous tutorial – thank you!
Thank you very much. There are only a few uses for me for flat felled seams, so you’re probably not missing out on anything!
Thank you! Grateful to know I can take it off the guilt-trip list. 😘 Lol!
😂
This is gonna look so cool! I just love your pockets! I love topstitching too, not a top stitching tip, but for pressing – I couldn’t live without my clapper!! It just makes everything so crisp and flat 🙂
Oh yes! I used my clapper on my pockets and then totally forgot about it with my seams. Sometimes my need to finish a project and wear it takes over from my need to do a good job! 😂
I really like the diagonal pattern on the pocket that you did with the red thread. Your pockets are perfect and that seam is so clean. 👍👏👏
Thank you! I enjoyed doing it!
Neat tutorial here! I need to keep it for reference. The pocket stitching is very nice, awaiting the reveal of the finished skirt.
Thank you! My sewing has been going slow here but it’s almost finished!
Slow going here, too, Linda. 🙁
You are doing an amazing job on the skirt, can’t wait to see the final results. I have always been nervous to try sewing with denim, your post is inspiring me to face my fear. Cheers, Michele
Thank you. This denim is quite light. I couldn’t make a pair of jeans with it, perhaps a shirt. So sewing a light denim like this is no different than any other woven.
Thanks for the tip about using lighter denim. Happy sewing, Cheers, Michele
👍😀
I love the non traditional topstitching colour! I’m working on a pair of red jeans with silver and grey topstitching and I think it looks fab!
Oh that would be cool – I’m looking forward to seeing it. I am behind on my reading – family things – but I shall catch up soon, hopefully I will see your jeans soon too – red, huh? Fantastic!
Between my procrastination (I’ve never made real trousers, never mind jeans before) and general loss of sew-jo they haven’t been finished or blogged yet. Hopefully I’ll get some work done soon and put some pics on twitter or instagram in the meantime……I’m going to do a quick afternoon project when the jeans are done….I’m no fan of topstitching!
Well it’s important to do the projects and sewing that you enjoy doing! Have fun!
Love those fancy pockets! Can’t wait to see the finished product!
Thank you! I think the pockets are my favourite thing. Too bad I couldn’t make a living making pockets!
Ooooh this does look gratifying! How do you do the rivets? Do you have a special tool or do you do some old-fashioned hammering? I have never done any, although my daughter did some grommets on a costume recently, the hammering method. I am intimidated…
Oh the rivits are coming yet! I use cement stairs, a block of wood a rivit holder and a hammer and I bash away – so satisfying! This fabric is light though so it shouldn’t be a problem – not as much bashing!
Oh, this is going to look fabulous! I do the same thing with pockets to make sure they match perfectly..love your topstitched design too!
Thank you! Funny how I can get obsessive about pockets and then not cut interfacing strips with a rotary cutter (straighter)!
I can totally relate 🙂
I love this, and can’t wait to see the finished skirt. Your topstitching is awesome!
Thank you!
So far, it is beautiful! The pockets are so cool!! I don’t mind topstitching (or flat felled seams, for that matter–they always look so clean and professional when done well), but haven’t had tons of occasions to do it yet. (But with more jeans on my to-sew list, that will change!) It really does add an extra touch to a garment, so I can see why you love the look. =)
Thank you! Every little bit makes for a more professional looking garment. I will be watching out for your jeans when you can get to them!