Back on schedule again! Perhaps some of you remember my other “Diving into knits” post?
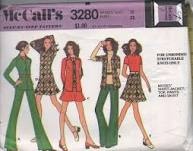 I have been using McCall’s 4261.
I sewed up my red T shirt, it was such an easy pattern to put together, but I think now it might be too nice to workout in!
Now on to my blue yoga pants.
Don’t worry! I ironed my pattern piece after taking this photo and before cutting!
I made some changes in the pants pattern too. I decided that I would cut out my pants a size smaller than my actual measurements. They just seemed so baggy as is. So I just folded the middle of the pattern piece over an inch. I also decided that I would not do a drawstring waist. I just don’t like them.
I got the crotch seam and inseam sewed up on my serger. I made a casing at the waist for running my elastic through and then couldn’t get my elastic through! Between the stretchy material and the stretchy elastic it just wasn’t working. Curses!
So I chopped the casing off. I do that sometimes… Let’s fix this by chopping it off and throwing it away!
Now I need a waistband. I decided to add on a wide yoga pants type waistband. So I cut some red knit material left over from my T shirt, twice as wide as the wide elastic I was going to use, plus seam allowances, and as long as the top of my pants. Then I sewed it together in a circle.
Next step, putting right sides together I serged my new waistband to the top of my pants.
Just to help hold the pieces steady I then pinned the wide elastic to my new waistband on my pants on the front, back, and sides.
Then I folded the rest of my new wide waistband over my elastic and pinned it again to the top of my pants, making sure I took out my previous four pins from the inside of my waistband!
Then I serged the waistband edge together with the top of my pants. The extra material of my waistband was cut off with my serger blade. I probably measured my seam allowances too wide and therefore had some to cut off. Oh well better more than less!
Finished! Much better!
I guess you just have to “crack a few eggs to make a waistband” or is that “an omelette”?
Happy sewing!



Those look fantastic!!! Next time something is irritating me, I’m going to consider the chop it off method! 🙂
Thank you! 😀
Love these yoga pants, I like how you added the wide contrast waistband. And, Kitty and I must remark on your wonderful and I’m sure extremely helpful sewing aids.
Thank you! Those “sewing aids” are a BIG help with everything I do!
I like your attitude ‘lets fix it by chopping it ‘ turned you good. Like your red waist band on your pants 😋
Thanks! I am wondering if I should make some more “chop and sew” activewear! 😀