

I have been watching the talented sewists over on Instagram take part in the #magamsewalong organized by @suestoney and @sewing_in_spain and their other monthly guests. I think I have been watching ever since the birth of the #magamsewalong! Of course, I always want to join in the fun so I was quite pleased when the January prompt was #januaryjadore. Part of my #makenine2019 challenge was some casual tee shirts.

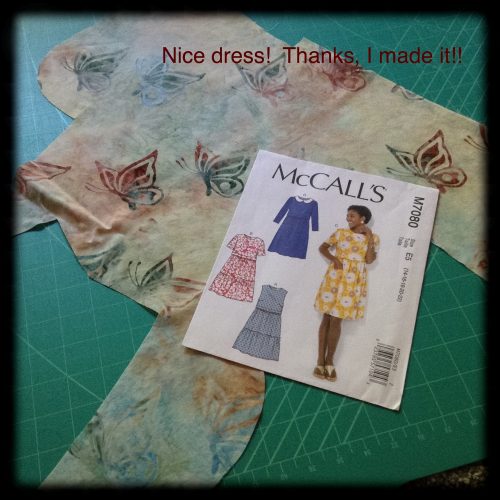
I did have a different pattern in mind originally, but, like many, the pattern I start a project with might not be the pattern I actually use. Instead, I pulled out a favourite of mine from 2013, Butterick B5988.

I have made this top EIGHT times now. I love it. I can make many alterations to the design, including some of my own, it is an easy make and it is very comfortable. So of course … January J’Adore!
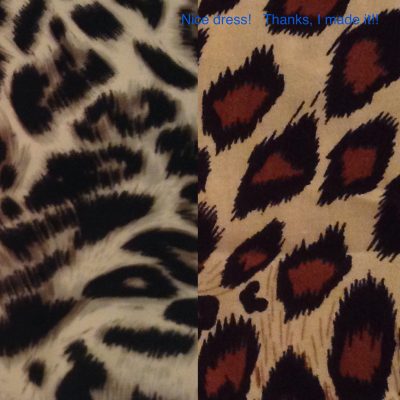
This pattern is meant for woven fabric, but I have never made it with a woven fabric. (When do I ever follow the rules!) Instead I used a few tricks to sew it up with a couple of knit fabrics from my embarrassingly humungous fabric stash!
The black and white knit was heavier and very stable, not so much with the print knit. It was very light, stretchy and curled at the edges. I used these tricks on both knit fabrics.
Sewing the shoulder seams:
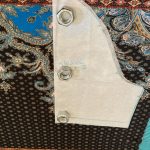
When sewing with knit fabric, I like to cut a small strip of woven light-weight interfacing to the correct length of the seam allowance and carefully pin it to my shoulder seams of my front and back pieces before sewing. Then when sewing I carefully ease the knit fabric to that interfacing length so it isn’t pulled longer or bunched up shorter. It feeds better through my sewing machine too and it certainly stops the shoulders of my tee shirts from dragging down!

Hemming the sleeves and bottom hem:
Again I used the strip of woven light-weight interfacing to stabilize the hem. I sewed it on the right side of the knit fabric as the edges were curling up, then I rolled the hem under twice to conceal the interfacing strip and sewed the hem again. This helped with any stretching or distortion of the hem line.

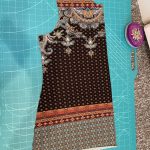
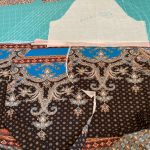
Matching the stripes on the one tee shirt took a bit of thought, but was not difficult. Since I have a large amount of the striped fabric I estimated how much I would need and cut off two generous pieces to work with for the front and the back.

Each of those front and back cut pieces were folded in half matching and pinning the stripes on both long edges of the fabric. My front piece was cut out, lining the stripes up with the front pattern piece.
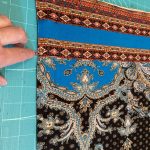
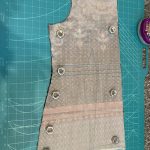
The second pattern piece, the back, I put more thought into. I laid the patten piece down, lining up the stripes again with the pattern piece, and then after placed the cut front on top to see how the stripes on the side edges would match up.
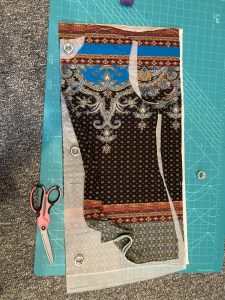
Matching up the sleeve head would have meant placing the sleeve pattern piece in the centre of the fabric, which would mean too much wasted fabric for me, so I decided to place it here, and lay the cut front beside to see how the design would match up. I love this design!
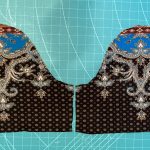
When laying out and cutting pieces one at a time, you certainly have to make sure you pay attention to your layout – be mindful of how much fabric you have so you don’t run out and are you actually cutting out two different sleeves – a left and right – and not two right sleeves! 🙂
Needless to say, Simon was bored with the whole process and demanded attention.

Did I make the deadline for the #magamsewalong? YES!!!! My photos were taken in a bit of a rush before my cell phone died, but I can now say I have two new tee shirts that I love AND I have finished another item of my #makenine2019 Challenge! 🙂 WHOO HOO!


If you haven’t taken part in the #magamsewalong on Instagram, join in! They put a lot into organizing and having one creative prompt for us each month!
Happy Sewing!
Thanks for reading and commenting!
STASH BUSTING WITH THIS PROJECT? Starting with the estimated 125.8 metres in the fabric stash, I now have an estimated 122.3 metres.

Great job. You’re turning into a real pro at making these lovely tops.
Thank you kindly! 😊
These two tops are lovely. I like how you placed the material’s pattern on the shoulders and near the bottom seam. The white one looks great with your hair.
Thank you! I love spending the time to get the pattern placement right! The white one was a lucky find! ❤️
Great ideas, Linda, and 2 lovely new tops to enjoy – thank you!
Thank you for stopping by! I hope to pop over to your place in a couple of days!
It’ll be lovely to see you!
Great job Linda!
You’ve really put the pedal to the metal on completing those two wonderful tops.
Congratulations to you!
Thank you!