Just by chance actually! As a matter of fact, I learned a couple of things.
I’ve decided I need more dresses in my life (again). I also noticed that IG is having a #sewtogetherforsummer Challenge that I can participate in – if I get my entry done by June 21st. I do not like deadline sewing, so this is going to be interesting.
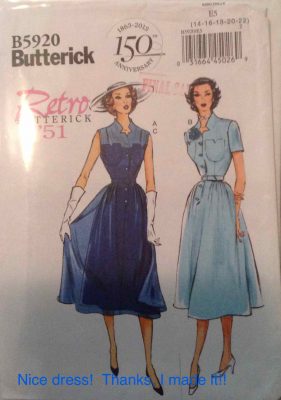
I have my shirt dress pattern picked out – Butterick B5920. It is an unexpected shirt dress pattern, as it might not even be a shirt dress. It’s a Butterick Retro ’51 pattern. Of course, there is NO WAY I am sewing heart shaped pockets on my chest – sorry. I am going to leave the pockets off completely. But I do LOVE this turned up collar. It kind of follows my neck curve like no other collar I have seen before … and I love it!
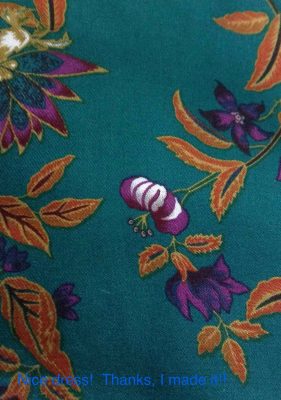
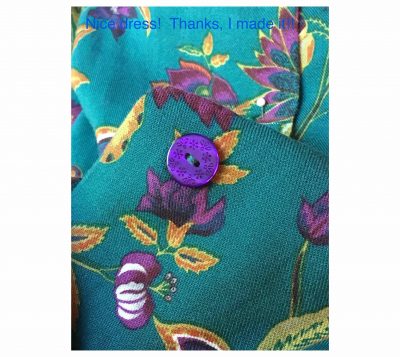
I’m not making the lined/gauzy one. I’ll be using this 100% rayon “Ellena Rayon Twill Print”. I love the shades of green and purple. I suppose I should as they are in my Autumn colour palette.
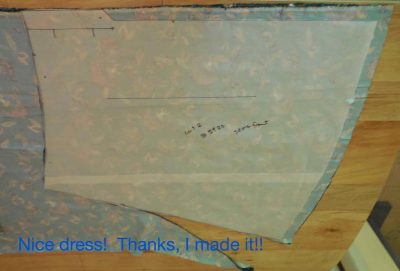
Strange the pattern asked me to cut out a skirt front AND a skirt back when both pieces looked exactly the same. So I cut out four skirt fronts instead – just cutting off the button placket tab to make the back piece. Cheating!
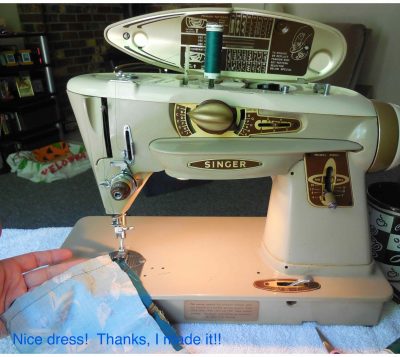
Now the fun, and the learning starts. I am still using my Vintage Sewing Machines for my projects. This one is a Singer 500 Rocketeer named “Barbie”. You can read more about Barbie here, if you like. I tested her stitch and she was still looking fine!
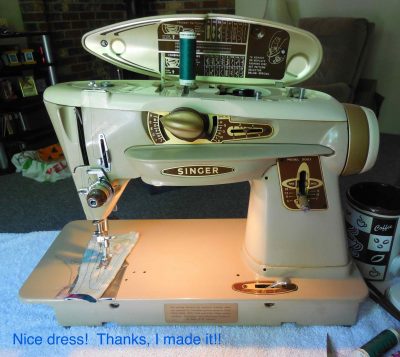
I tested seam length and needles out on this 100% rayon fabric too – Barbie still had no problems. (Can you see the cat’s bed in the background left? They love to follow us from room to room and I always try to coax them away from my sewing area to a safe warm out-of-my-way cat bed.)
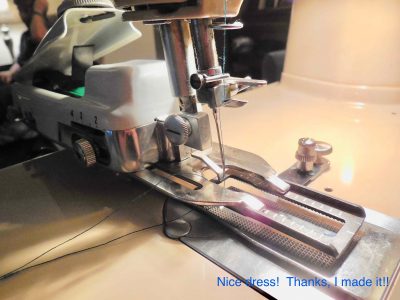
So when does the learning start? Right here with my Professional Buttonholer by Singer. My Rocketeer was purchased in pristine condition by me from the previous owner. Barbie was born in 1961. The Buttonholer that came with her even had the original instruction manual (copyright 1967), the sales receipt ($17.80) and the plastic cover.
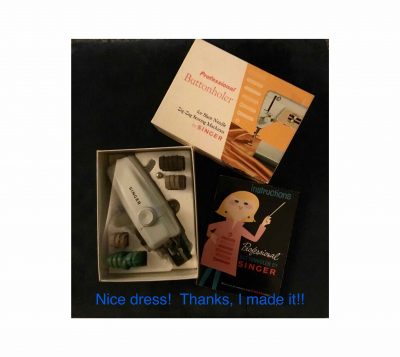
I was happy to go through the manual thoroughly as I had no idea how to operate the Buttonholer. And what did I find – all the parts were there EXCEPT one feed cover plate screw … missing … lost.

This is the first lesson I learned – don’t be shy to collect all the sewing parts, bits and bobs, and stuff that you can get your hands on. In my bags of do-dads, I found three screws – two of them fit!
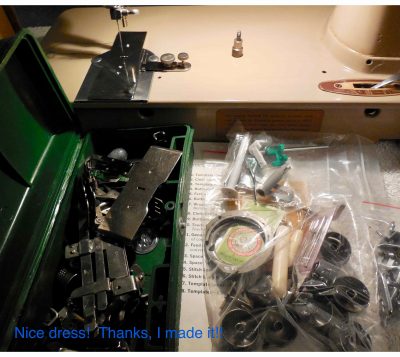
On to my second lesson learned – how to attach and operate a Buttonholer. I was happy to have the instruction manual as I didn’t find much help online, so I thought I would share with you. (I’ve left the template cover open just so you can see the green plastic template inside. The template cover is closed and locked when actually operating the Buttonholer.)
Barbie is set for a zig zag stitch with the needle at the centre position. Zig zag is for “worked” buttonholes (finished with thread) and straight stitch is for “bound” buttonholes (piped with fabric). The regular sewing foot is removed and Buttonholer screwed on instead, with the fork arm of the Buttonholer fitting over the screw of the needle clamp.
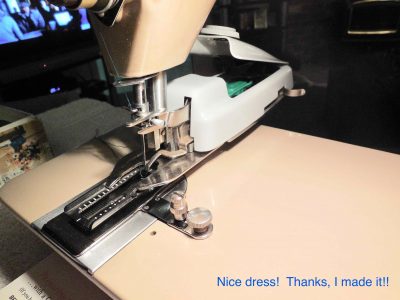
On this side, the front screw unlocks to allow you to adjust the Space Selector above to the same number as Barbie’s stitch width setting. The back screw unlocks to allow you to adjust the Stitch Length Selector – 1 for “worked” buttonholes; 2 for “bound” buttonholes.
Line up your bodice centre line with the second line marked on the cloth clamp, and your buttonhole line with the centre line marked on the cloth clamp.
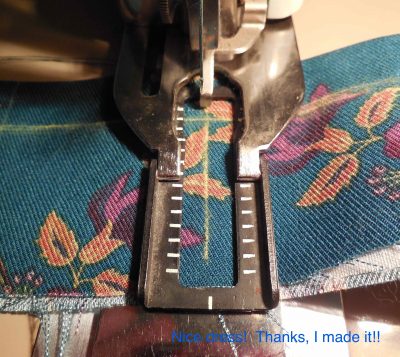
Ready, set, sew! No hands even!
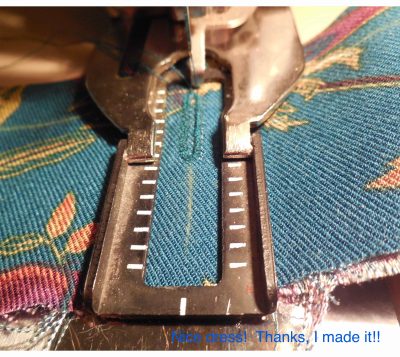
Test buttonhole done.
And some more practice until the lesson is learned!

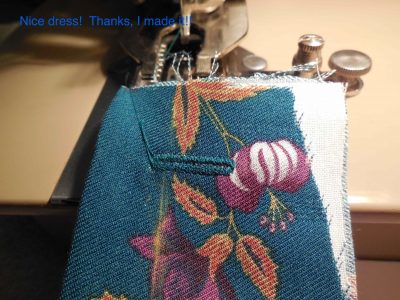
Time to sew on these FAB buttons! These were such a lucky find and a perfect match, don’t you think?
I couldn’t resist showing you this – turn up the volume and just listen – doesn’t this just sound like a ticking clock? Nothing at all like my modern computerized sewing machine!
I was so happy to find Barbie, my Rocketeer, in such good condition with the Buttonholer and instruction manual and all her accessories. Searching on line I didn’t find much help on how to attach or run a Vintage Buttonholer – makes me think I should Youtube my own “How to use a Vintage Buttonholer” for others not lucky enough to own the instruction manual.
Happy Sewing!
38 responses to “I learned something new…”
What a gorgeous sewing machine! Good luck with the shirt dress. I found my pattern but have been having major problems actually downloading it, so that deadline is starting to look impossible…
Thank you! I quite often get delayed in these “deadline” projects. I hope you solve the printing problem, even if you don’t make the deadline,
I have one of these Singer vintage buttonhole feet, too, but I hadn’t tried to use it yet. Thanks for posting this tutorial, it encourages me to give it a try.
You’re welcome, hope I could help. The thing is scary and confusing to look at. But if it works, it’s fabulous! On mine, the screw on the side to unlock the selector was very stiff and hard to turn but I got it moving with some sewing machine oil and some patience! Have fun with your’s!
Fantastic – I’ve got an old Singer 201K (which is a straight stitch only machine) and a vintage buttonholer for it, too. It’s amazing fun to use, if a bit noisy and the buttonholes turn out nicely. Less likely to jam up on heavier fabrics than my new Janome, I find although sometimes I have to go around the buttonhole twice. What a great idea to sew up a vintage pattern on a vintage machine! There’s a tutorial for the buttonholer I’ve got at https://singer-featherweight.com/blogs/schoolhouse/66796227-how-to-use-the-singer-buttonholer-attachment
Yes, I went around twice with mine too. I like a more noticeable buttonhole. I’ll have to go take a look at the tutorial, I want to make sure I catch all the details. I’ve got a Featherweight and another Singer buttonholer too so it would be nice to see if there is any difference!
Linda, that pattern is just gorgeous. Learning to draft a shawl collar is on my ‘to do’ list. I wonder how different your buttonholer attachment is to a commercial buttonholer? Fab piece of mechanics and bonus clickety clack!
Thank you! I had a jacket pattern once that had a lovely shawl collar. It was quite unique. This one seems to be just large enough to stand up on its own. It is quite unique too! I’ve never seen a commercial buttonholer. I’m going to have to google it to see how similar they are!
Barbie’s gorgeous, and you should definitely do a you tube video to share what you’ve learnt, and so we can see Barbie in action! 😃
Haha, then you’ll have to listen to my funny Canadian “accent”! 😂
Looking forward to seeing you in your new dress. I adore Barbie and really want one of my own! I have several buttonholes and they are all slightly different. I did master them at one point and decided that they make the best buttonholes so I should go back to using them.
The only thing I found lacking was the variety of shapes and sizes for the templates. I could get all the sizes I needed, but not in every buttonhole style. I’m spoiled by computer technology, I think! But I do love taking my hands off and watching it sew a perfect buttonhole! My computerized machine veers to one side!
Love your cool buttonhole attachment and the fabric for that dress is gorgeous. Can’t wait to see it finished.
Thank you! I’ll be showing the dress soon. It needs some hemming, and I want to check on the fit again. Just a bit!
Love the dress and the machine! They sure don’t make them like why used to!
Thank you! I was very lucky to find her!
Barbie is perfect! Who needs all the do dads when you’ve got a vintage sewing machine and extra screws lying around to make the machine tick tick tick.
Better words have not been spoken!
Barbie is just beautiful! For some reason she makes me think of Thunderbirds!
Thank you! It does for me too! Probably because of her “fins” like the old cars!
Vintage pattern sewn on a vintage machine. Fab. Look forward to seeing the dress finished.
Haha, yes, I never thought of it that way. I guess because it was a “re-release” of the pattern. But true it is a vintage style!