


and I’m not quite finished yet!
Let me tell you what’s up …
I have been searching for a pattern and fabric to make a “replica” of my mother’s and aunt’s dresses in this photo. My Aunt was a seamstress back in Europe and she not only sewed for clients but also for herself and my mother. She used no patterns and could make anything! I thought I had the magical combination for this dress with this 100% Rayon Denim Challis I had in my stash – a favourite fabric of mine!


I still think this pattern, Vogue 1395, might work but it doesn’t have the rounded neckline that I want. Being lazy, I thought I might just make two bodice backs and use those to make the bodice instead.


After all, the bodice back looks similar to my mother’s and aunt’s dresses anyway.


I even added an inch on the fold to make the bodice and skirt more gathered looking.


I was a little short on fabric so I had to plan a creative layout.


I folded the fabric with the salvages meeting in the middle so that there would be two folds on the edges of the fabric for the two bodice backs.

Now the pieces fit just fine!


Bodice front and back sewn together.

Time for some self made bias tape for the arm holes. I estimated, when cutting, making my fabric strips approximately 2″ wide but I then recut them using my ruler and rotary cutter for more precision.


Self made bias tape strips sewn together.


Barbie, my Singer 500 (a Rocketeer), in action sewing on the bias tape.


Some pressing to be done.


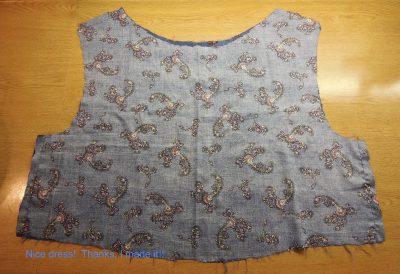
Finished – collar gathered and sleeves hemmed with self made bias tape, but …


I don’t like it. This fabric doesn’t drape nicely at the gathered neckline, like in my mother’s and aunt’s dresses, and the armholes are too large and gape. I probably shouldn’t have used two backs without checking the arm sythe? 😬

Actually, these armholes are at least an inch lower, and larger, than the armholes of my favourite “me-made” dress.


I picked open the bias tape and the side seams and tried sewing the armhole in tighter.


The armhole is nicely finished again, but I’m still not satisfied, and it still feels too big.

I don’t have any extra fabric to “fix” this dress, so I’ve resigned myself to chopping it up to make a top. It’s turned out nothing like I imagined my mother’s and aunt’s dresses would be like anyway!
Well, let’s just walk away from this for a day or two …
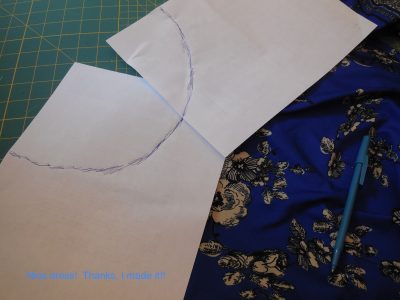
To start making a top out of this beautiful fabric, I decided to redraft the neck line with a facing. I copied the curve of a favourite “me-made” top.
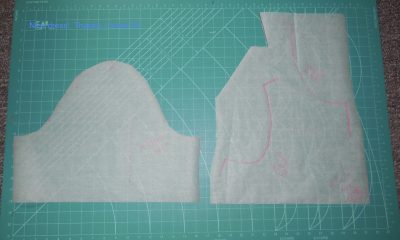
I cut out the pieces and interfacing for the neck facing …

and this time, it was attached with slight gathers in the bodice neckline.

Looks good, but I don’t like it. It’s too high now.

I ironed a fold into the centre of the front of the top.

Cut a slit of about 3 inches in the front neckline and tried it on. Yes, this might work! I made a facing for that slit too.

Sewed on the facing and clipped to the corners.


A perfect slit in the neckline. Much better. Now to sew down the facings.

Like so.

Done!

Now back to my sleeves. I cut a sleeve from another well fitting top pattern, even copying the arm sythe.

I think I might have salvaged this project enough to get a cute top out of it. Also on the plus side, it could be said that I had a chance to practice a few sewing techniques along the way. I still haven’t finished my top yet though. I still have sleeves and hemming to do – which should be easy, I hope!
My mother’s and my aunt’s dresses will just have to wait until a better fabric shows up!
How persistent (stubborn) are you when it comes to getting the specific look you want?
Happy Sewing!