

For the past few weeks I have been working on my Islander Sewing Systems, “MotorCity Express jacket“. I received this pattern when I purchased the Craftsy course “Sew Better, Sew Faster: Smart Construction“.
I have worked on the facings and lining layer, my sleeve gusset zippers and zipper pockets, and last week my fashion fabric layer.
This week I bagged the lining! I have, sort of, bagged linings before. But this pattern had a final step for the sleeve layers that I have never done before, one that made for less hand sewing and more machine sewing – always a bonus!
My lining and fashion fabric layers were completed. I did sew some shoulder pads in as I thought the shoulder seams sat better with the padding. I double checked that my lining layer side seam had not been completely sewn shut – that is where I am going to pull my jacket through to turn it right side out.
I sewed my two layers together at the hem, right sides together.
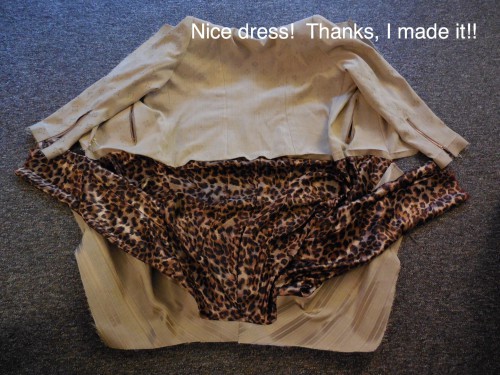
I sewed together my two layers, right sides together, along the two front edges and the neckline. Remembering to use my zipper foot on the front edge that contained the zipper. I slid one layer of my sleeve into the other and pinned them together to keep them out of the way.
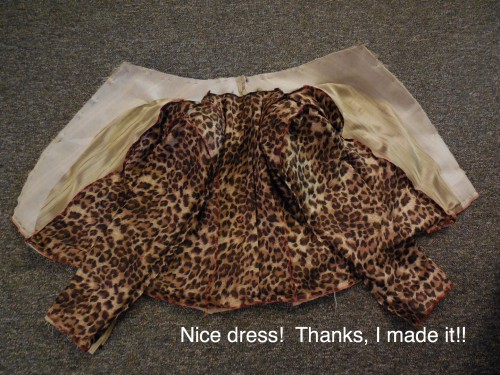
Clipped my four corners to reduce bulk and slipped my hand inside my side seam opening to grab one corner at a time and gently pull it through the hole.
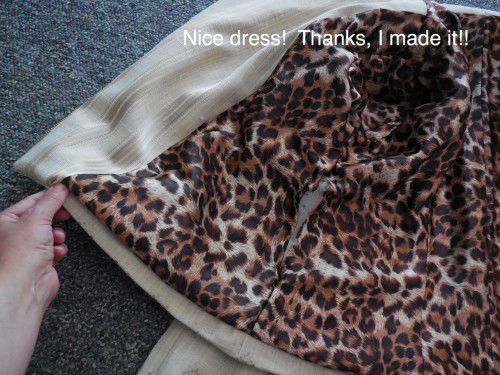
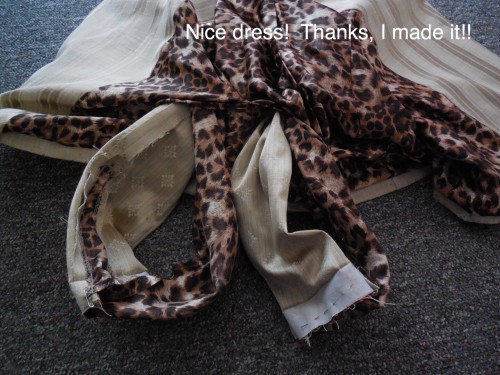
 After pulling all my corners through I had my jacket lying flat with the wrong sides together. In this photo you can see the opening in the side seam of the lining. You can also see a small hole in the front inside where the facing and the lining meet. The pattern had proper instructions on how to sew this area to close the hole before you pull the jacket through… but I literally gave up on reading the pattern instructions at this point and decided to pull my jacket through and hand sew the small area closed instead. Maybe someone else will have better luck understanding the instructions and diagram to close this hole, but I was just too anxious to get the job done and knew that I could hand sew the hole afterwards!
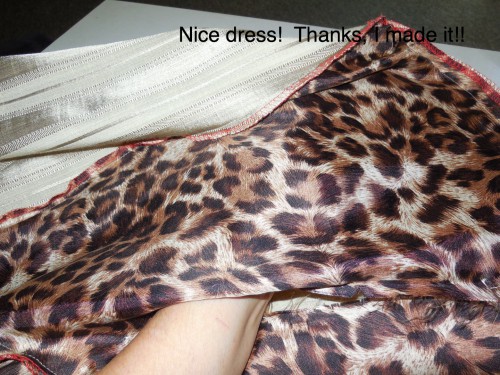
 Now when it came to the sleeves, I did really read the instructions carefully. I have bagged a lining before, but not sleeves. Usually I just hand sew the sleeve layers together afterwards. This time I did as instructed. I pinned the sleeve hems lining up the seams. Then I pulled the sleeves through my side seam opening and re-pinned them carefully, this time right sides together, ensuring that the seams were still lined up. After sewing the two layers together, I pulled the sleeves back through the side seam opening and it worked!
 Finished MotorCity Express jacket – just needs some hand sewing on the side seam to close it up!
 We had the weirdest weather today – beautiful sunshine, thunder and pouring rain, then sunshine again. I took advantage of the sun to take these photos. Too bad I was wearing a Tee shirt and yoga pants and pink fuzzy slippers with my MotorCity Express Jacket! Islander Sewing has come up with a lovely jacket pattern. I like it just as much as their previous jacket pattern, the Jacket Express! (And, as usual, no one is paying me to say that!)


So what is my next project? Well… my family has been neglected. Mr. Green Thumb wants the long sleeves on three shirts shortened. My Lovely Daughter wants a button sewn on. I need new elastic put in a skirt. Thrilling, huh? What are you up to?
Happy Sewing!
41 responses to “Learning something new…”
You go girl!
I know this technique is not rocket science, but for the life of me right this sec I’ll have to re-read it with less running through my mind. I love, love this jacket on you, the fabric, the fit . . . WOWsers.
Cheers,
Lyric
P.S. Let me know if you need to adopt a sister from another mother to come live with you over there. I’m available. So pretty.
Haha perhaps it’s the way I explain it! Na, I don’t know about being sisters with you cause I think you just want to borrow my clothes!! Fess up!! 😂
This looks really good. It looks like it’s professionally made!
Oh! Thank you! It is my new favourite now!
My patience would have been put to the test with all the zippers but you did a fabulous job. The bagging, well, I can remember reading instructions to do with that years ago and let me tell you I read them more the once. I think there may even have been a little “unpicking” involved. Beautiful job.
Thank you! I’m still not sure how the sleeves worked out. I just did what I was told! 😀
Looks great on. Love your choice of fabrics. Now if you lived here you could be wearing it every day – with a brolly in your bag of course!
Thank you! I am quite happy how it turned out. It has been so warm and dry the past three months, we have forrest fires! 😟 very usual for us!
I was about to like that then realised forest fires are actually very scary!
Most of these are in the cabin areas near us. Far enough away for us to not worry. But it has been an usual summer. Don’t worry, I “like” on here and on Facebook all the time… Kind of a “I’m hearing you” button!
Just fabulous. Love that lining. A really special jacket, beautiful work.
Thank you, Barbara!
I love the way you describe this process–you “bagged it”. Kinda like bagging a moose but more satisfying. Not that I’ve ever bagged a moose or ever want to. 😉
Nice job Linda.
Well Thank you! I’ve never bagged anything myself, but I’m happy I got this one right! (I don’t know where the term bagging came from in sewing, but I can tell you when I was turning my jacket inside out, it didn’t look like a jacket, but more like a bag of fabric… Just a guess… Does anyone else know?)
Ohh, you look fantastic! Great jacket, the lining is so cool!
Thank you! It was a big project, But I’m happy with it.
Gosh, it looks complicated – but what a triumph!
Thank you! Like any big project, I take it in steps, even have a break if I need to. I am really happy with the finished jacket!