
Every time I make a pair of pants (trousers) for myself I first take a look at this photo. No, I did not make these. This is how RTW (ready to wear) fits on my body – and this is the right size. Just awful! This photo reminds me that no matter how little or how much work it is or how good or bad it turns out, me-made is always going to be better than this.

I have cut out three pairs of pants so far and last Tuesday I finished the first pair – the chocolate brown ones. I used McCalls M6901 (a Palmer/Pletsch pattern). I didn’t use to like Palmer/Pletsch patterns – basically because they just went on and on, page after page of instruction to which I never paid any attention. Silly me!
I had previously made a muslin and after some work on it, I think I got the fit down. I had a bit of a delay in finishing my pants though because I decided to hand sew the waistband down and the hems up. Unfortunately my right thumb joint decided I had done enough hand sewing before I got half way through the job and I had to spread it out over a few days. I think my goal in future sewing projects is going to be use my sewing machine more, and hand sew less.
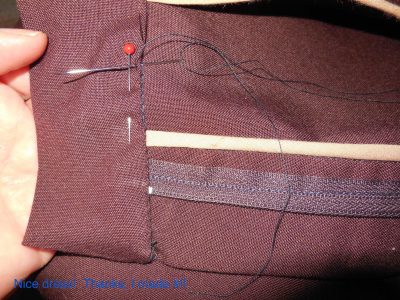
Now this is where the Photography comes in. I love taking photos for my blog, but even better I love taking photos to check fit. Photos really help! I have no other way of seeing how my garment looks in the front and back. So I tried on my pants to check if I had pinned up the hems to the right length, and no, my photos showed they dragged and tangled on my shoes.
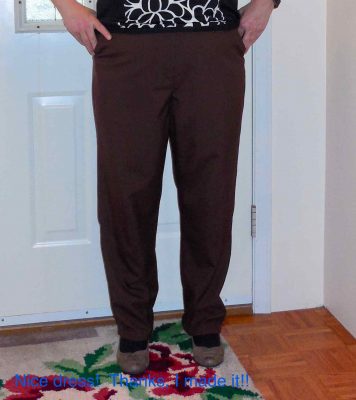
But just imagine my distress as I looked at the other shots I had taken – side and back views. Fine in the front, baggy in the back.
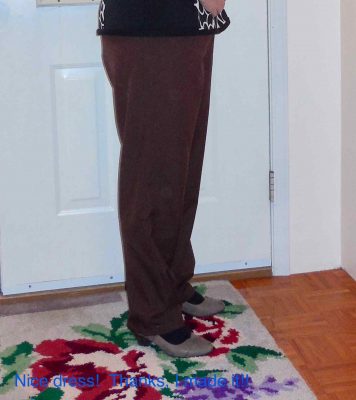
Fine in the front, baggy in the back. (Simon even thinks so.)
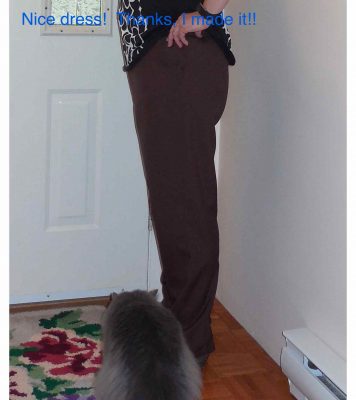
OMG!
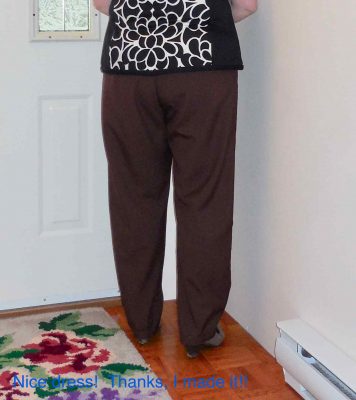
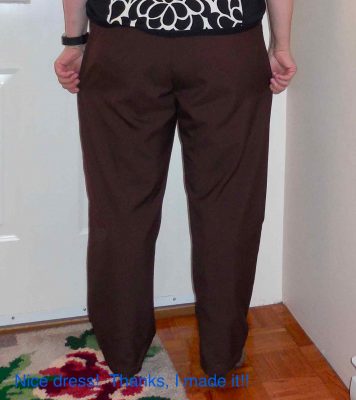
Too much fabric. I though I had gotten rid of this! Pulling on the side seams gave me a clue.
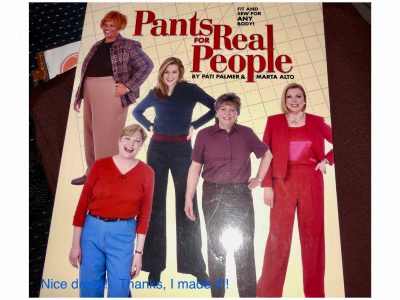
But it was definitely time to pull out my favourite book. I tell you if they included a pants pattern with this book – you would never have to buy another pants pattern or instructions again!
I checked out their pages and discovered that I should take the excess fabric out of the side seams (surprise, surprise) and deepen the centre back seam/the crotch seam. I also took a bit out of the inseams, just in the thigh area.
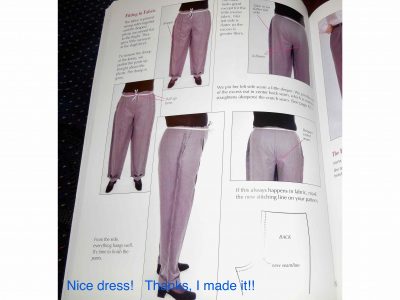
It also looks like my right hip is higher than the other, but that can be adjusted too!
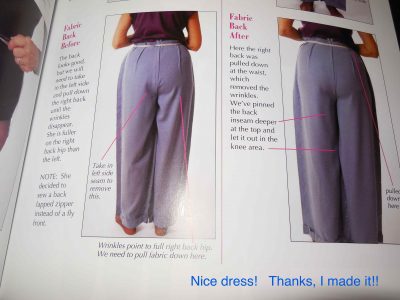
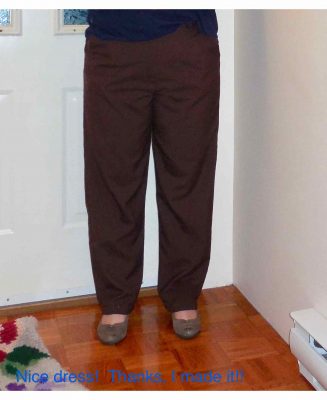
More alterations were done and more photos taken, the front is still fine – my hems are still too long though and still get tangled in my shoes.
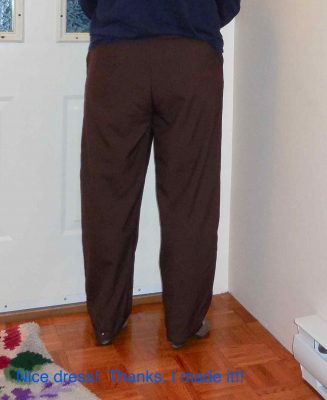
The back is much better – my right side is still being pulled to my high hip – that has to be fixed.
My most useful resources when fitting pants? My research and photos … and my patience! These changes will be transferred to my pattern pieces to help with my next two pairs.
What’s your most useful resource – a book? website? a sewing tool?
Happy Sewing!
Oh yes! This is my second garment in my #2017makenine Challenge. And these pants were sewn on Amber, my Singer 421G. She did good! Oh! I just noticed this is blog post #200 – thank you for your support and comments. I love comments!
52 responses to “Photos really help!”
Aargh the dreaded saggy bottom. We need a pattern line for the flat butt brigade. Sometimes I think it would be easier to sign up for an exercise class for glutes improvement, but there’s always the wear-it-with-a-tunic-top solution. You’ve made a giant leap towards getting your basic pattern sorted, such a huge difference to the rtw horror.
So funny! and Yes, that’s exactly it! The “RTW Horror”! I am so happy I can make some changes in my pattern when sewing. It’s not perfect. It usually takes making three pairs in a row before I’m really happy with it. But it is definitely better than RTW!
There is one pattern I’ve come across for those with a less than full bottom (I’m including myself in this group btw). It’s the Flat Bottom Flo trouser pattern by Style Arc. I haven’t tried it but there are a few versions out there in the blogosphere…
Hmm… That’s cool! I’ll have to check it out! I did the final alteration to my pants and I’m loving them!
Hurray
A lot of pant patterns these days have you sew both legs, and then put one inside the other and sew the crotch CB/CF seam. I think that’s fine if you know absolutely that the pattern fits; otherwise, I think it’s better to leave the outside seams until last (which is the old way as I remember). I also made a pant block using a combination of a pattern that fit well and a favourite pair of pants that fit well. I think that’s the way to go for close-fitting pants. Your alterations made a huge difference. I don’t know if your front waist and back waist are the same, but I always have to lower the front waist about an inch.
I prefer sewing the front and then the back and then sewing the two together, as altering the side seams and inseams always help me with my fitting. When making jeans it particularly helps with topstitching and sewing in the zipper fly to sew it together this way too. I can’t remember ever putting the two legs together and sewing the crotch seam – I certainly wouldn’t like that method! I find my alterations are always done easier with the side seams and inseams. I did copy the waist according to the pattern, but I think with the next pair I am going to pay more attention as I think some alteration needs to be done there too. Thanks for the input and ideas!
Your persistence paid off. Great fit.
I think photos are the way to go. I do that to see whether I really like a garment. I don’t do smart trousers but if I did I would get that book – sounds invaluable
Thank you! I find it so difficult to look at myself without twisting and turning. Photos help! I’m glad I’ve done some reading on fitting too. I aim for perfection and don’t get it, but that’s okay because it’s better than RTW! 😃👍
Your right hip is higher than your left? So is mine. I suspect the fact that we’re related has a lot to do with it. Sadly I’m a klutz at sewing so I have to pay a seamstress to get the hem right for special outfits.
As your photos show, it makes a BIG difference. The pants look fabulous.
Yes… And we both have flat butts too… Don’t deny it! It’s in the genes! Thanks for reading and commenting! 😃👍
Hahaha 😉
And congrats on Post 200, what a milestone!
Haha. Thanks, it sort of sneaks up on you! 😃
Well done for having the courage to tackle trousers! Pants for real people is usually my pants fitting bible (and Fit for real people for all other garments). If I have the time, I usually do a quick tissue fit like they suggest in the book. That usually sorts out thigh too loose or too tight issues right away, plus a few of the crotch alterations. One other thing to consider are side seam length and inseam length. Especially the side seam gives some wrinkles that I usually struggle to diagnose, but if you pull up the waistband at the side seam only, they tend to disappear. But I think this is a pattern alteration, though not sure if it’s covered in the book. Good luck with the rest of the trouser projects!
Thank you! Yes this book mentions that not everyone has a waistline that is horizontal to the floor, as the pattern wants you to be. So it is possible to have a 5/8 inch seam allowance at the waistline on the left side and a 1/4 inch seam allowance on the right side. That’s why it helps to have extra fabric at that waistline too, for adjustments. That would get rid of the vertical lines I have on the back of my right leg. RTW doesn’t do that for me! I’ll have to keep my eyes open for their other book!
Oooooph….just thinking about pant-fitting tires me out. I am still at the hope-for-the-best stage….mostly my “best fit” looks like the picture where Simon is agreeing with you. Kudos to you for persevering, your fit looks a lot better than the original RTW, for sure. I just found recently when I made those 3 pairs of Tilton pants from the same pattern, that fabric weight throws out the Best Laid Plans of Mice and Men again. But still. Anything is better than RTW in my case.
Yes, the muslin seemed to fit better so unless I was totally off, this fabric seems to “stand away from me” more than the muslin fabric did. I’ll get there… After all, I have this pair and two more to go! 😃
Ah trousers, trousers…I gave up in dismay when trying to get a really good fit on the missus, but I must persevere. I don’t ‘do’ sewing books, but I’m always hearing how good that one is. Time to invest methinks!
At least when making a pair for her, you can see how they look on her at every angle… I guess that is if she is patient to continually try them on as you go along! I like this book because it shows how to sew a pattern together as well as every body type and alteration. They try to make their patterns helpful that way too, but they just can’t get all that information in a set of pattern instructions.
Photos are a great tool for you to see everything that’s going on. Saves dragging in a family member who has no clue anyway!!
One other thing I check is the side seam view. In the mirror or photo you can see if the side seam is sitting at right angles to the floor and waist. If there’s a wiggle here its a really obvious one.
Trouser fit is such hard work !! 🙂
Yes, I usually get “how does this look” “just fine”! I agree, my side seam was wobbly at the pocket on my muslin so I straightened it out for this brown pair. It’s important to not have your pants appear to be wrapping around you’d body!
You could also try folding out an inch or two in the back pattern piece close to the crotch when cutting out and adding it back to the hem. This shortens the back thigh only and really helps to avoid saggy bottoms. I do it every time I make trousers. 10/10 for not giving up!
Thank you, advice always welcome and tried … and I never give up! 😃 like I said, RTW never looks good on me, so not matter what I do, it’s going to be better than RTW!