

I used to buy more bags than clothes. Every time I walked past a bag shop I would stop in. After “just stopping in” a few days in a row, I’d finally buy what I had been looking at. Now that I think about it, I pretty much always bought bags with the same “insides” but with a different style outside.
I haven’t bought a handbag for myself, I think, since I started my RTW fast in January 2015. I not only broke the clothes shopping habit, I also broke the bag buying habit!
I have been scouting around for a me-made replacement. I bought this pattern from Sallie Tomato. Although I haven’t tried the pattern yet, I love the look of it! It looks almost exactly like what I usually bought. One zippered pocket each for my bus pass, my keys, my wallet and phone, and one big enough for my iPad. Oops! It’s missing the space for my iPad.


No problem! I’ll just figure out a way to add another pouch on the backside of this Sallie Tomato bag … um … hopefully!


To be on the safe side I cut out 12″ squares of my exterior fabrics and my lining, 8 squares total. Then there were the 4 squares of fusible Shape Flex for the lining pieces and the 4 squares of fusible Thermolan for the exterior pieces. I used fabric remnants, so I didn’t decrease my fabric stash any. 🙁 Good thing though – if it doesn’t work out it’s no loss! 🙂


The Thermolan didn’t fuse again – do I need a new iron? do I need to be more patient and press it more? – so I basted it on to all my exterior pieces.

I cut every one of my exterior pieces into the planned uniform strips.

This is the exterior backside of my bag…

with topstitching.

Next day I came back to prepare my zippers to find my tension messed up. I could clearly see that one, or both, of the cats had been playing with the upper threading of my machine. An easy fix … after rethreading my machine and ripping this out!

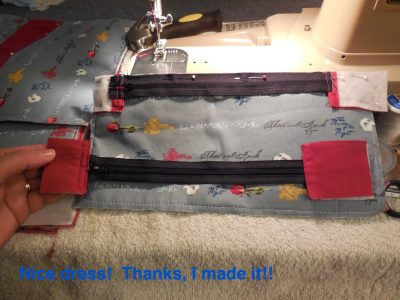
It was easy to sew these zippers in and add the topstitching.


The pocket linings were sewn onto the seam allowances left by the zippers.


Now the exterior front of my bag is complete with zipper pockets. Thank you Sallie Tomato for the inspiration and explanation!

I just need to finish off a bit of topstitching and sew in the bottom corners of all the pieces and these pieces are finished.

Bottom corners sewn in on all pieces, exterior and lining.

Now for some fun with the interior zipper pocket. I chalked in where the opening was to be and sewed it to mark and reinforce it.

I pinned the pocket lining on the right side of the interior lining on the back piece where I wanted the zipper pocket to be.

Sewed it following my previous stitching line and cut the opening carefully.

I pushed the lining through the opening and pressed it flat.


Wonder tape helped me place the zipper under the opening in my lining piece.

Zipper and pocket lining sewed in … and a label!

Before I sew together my two bag pouches I better sew the middle pieces of both pouches together, and what better way than to sew a pocket shape?

Next, with a lot of patience and manipulation, the fronts and backs of all the exterior bag pieces are sewn together (which is a bit tricky considering that two of the pieces are already sewn together). The same is done with the lining pieces.
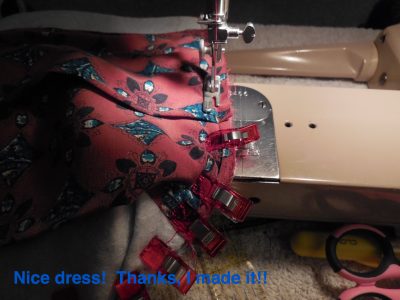
This is what I have so far …

Then I went to the dentist for two fillings and lost my sewing mojo. Time for a break! But hang tight – I’ll be back with the “Big Finish!” next post!
Happy Sewing!
STASHBUSTING WITH THIS PROJECT? None, sewn with remnants, so still 145 meters remaining! (I think, after this bag is completed, it will be time to make some dresses!)
SaveSave